Wednesday, 13 October 2010

Branding and Adverts

  This week we gave our presentation about advertisements with my group. We weren't finished with some of our presentation and didn't have a script ready for any of our members so we just came up with a speech and went with it. I would say we did good and we also gave a good point about selling the items separately and in the process gain more money. Well we needed to work on getting on deadlines and getting everything prepared in time. What we did well was getting ideas that worked well with selling the items.
 After break I went and started on my research report for advertising and campaigns. I watched old adverts and recent adverts from youtube to later on compare them in my report. I really need to work on staying on task when doing my report cause sometimes I would get off task for a few minutes.
 Then for the last lesson, in our previous groups we had to make a logo for dog food called Doggie Yum. We worked individually and made some pretty good logos. Mine was with different types of fonts for each letter.
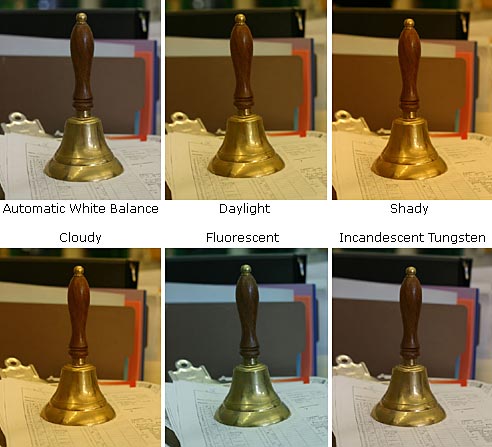
  Here is an picture different types of fonts :


Thursday, 7 October 2010

Mr H comment

Nice work Sam but try to include more detail and be more reflective in your commentary.

Wednesday, 6 October 2010

Campaigns & Adverts

  This session our class got split into 2 groups. One at Parkside and one at Coleridge. I got put in the Parkside group.
  First we started to look in the yellow book and see how the yellow pages advertisements could catch peoples eyes for emergencies, for example we looked at an advert for emergency plumbers and which adverts are more persuasive and most likely to get a call.
  Then we worked on researching about advertising campaigns. We learned about 3 types of campaigning adverts:
1. Raising Awareness
2. Stating a Point of View
3. Advertising a Product or Service
  I had a good start at my reports and for 3 lessons I basically only researched for it.
  Then we went into a group of 3 and we worked on making an advert for some photography equipment like the Vivitar v635:

  An Air Release:
 Miranda 500-CD Flash:
 A book of Photography:
 and many other stuff that we had to take photos of. My job was to research the prices of the items and write them down as well as uploading the photos to the computer.

  Next week my group will have to give a 5 minute presentation of what we are advertising.


Wednesday, 29 September 2010

In the Dark Room

 Well for the first time I headed over to Parkside to do CRAM and also produce some pictures out of film in the dark room!! Mr.Durran escorted some of us that didn't know where the photography room was. When I got there wasn't that many people there and we didn't know where they were, but after a while they started showing up and saying they thought the lesson was at Coleridge. For the start of the lesson Mr.Hind started teaching about how to produce film and also told us what to do when we would go out and take some digital photos and use adobe photoshop. First I went with my partner to take some photos and we had to use a skull in every one of them. After that we went on to do producing. Since I never worked with film it was really cool learning it. First of all if you want to produce film it has to be in complete darkness which I never knew about , if it even gets exposed to light the film won't show up after you finish producing it and you'll have to start from scratch. So when I learned when you want to get the film out of its case and into a reel and then into a kind of cup that you can put chemicals in.So first we would have to put all the material into a black bag and then we put our arms into the arm slots that it had so that we could work in the dark, know the hard part doing all that without actually seeing it. I managed to take the film out of its case and cut the end of the film in a straight line with scissors but I couldn't put the film into the reel and I let my partner do that. He managed to put the film in the reel also cut the other end of the film and put it in the cup. After step 1 we went into step 2 which was to put all the chemicals in to make the film lightproof. We already had the developer ready which made the film develop it had to stay in the cup and I had to shake it and tap it on a table every 1 so that the chemicals can wash around and pop any bubbles in the chemicals cause it could show on the film. After 7 minutes we washed the developer out of the cup and then put fix into the cup, fix basically makes the film lightproof. It took 4 minutes then I had to rinse it out with water for 10 minutes. After the producing we went on adobe photoshop and here are some of the photos we took:
  Then we had our turn to go in the dark room and get some photos. We learned how to use an enlarger which looks like this:
I successfully printed 2 photos and completely messed up 1 photo by taking it outside before adding any chemicals.
My goals are to work better in a black bag and to add all the chemicals before taking it outside.

Wednesday, 22 September 2010

Mr D's comment

Good start, Sam!

Working with Still Images and Editing!!

  Well when I got in class the first thing we did was edit some of our filming we did last week,but before that Mr.Durran taught us how to work better with Adobe Premier and then started to edit. It was funny when we edited the part I jump out of the bush. We put it slow motion and also added some horror music to make it look even better, the good thing was that our computer was connected to the projector and everyone saw in the classroom saw it :P.
   After break we continued editing for the rest of the lesson and for some reason the part where I jumped out of the bush took a long time rendering and we left it.(in the end it didn't even finish rendering).
  Here is a link that will lead to a edited video which is pretty cool:http://www.youtube.com/watch?v=odn8eO1BGkU
  After lunch Mr.Hind starting teaching about still images. He showed us a couple of pictures and how if they were staged or not and how the they were placed. I learned a lot in that session about still images that I never knew about before. There were also 10 rules about still images I learned about as well.They were some like having balance,cropping,rule of thirds and being experimental in taking photo's. After that we were assigned to go in pairs. We started out taking pictures around the quad are and soon all around the school. I managed to stage my pics alright and use the rule of thirds.We didn't have much time so we only took about 20 pictures.
   Here is a picture I thought were photographed well:
  Soon after that I headed back to my group so that we could finish our editing,but yet again the rendering took ages so time pretty much passed and then we decided to stop rendering. Well that was my day at CRAM.
 

Tuesday, 14 September 2010

First day out filming :)

Well today being the first day I went out to film was pretty good. But before I went out to film I learned how to use different things on the camera like how to adjust the white balance and fix the exposure. It was also useful to find out how to frame a scene and make it look professional by not zooming in and out most of the time , because it will make the footage look unrealistic.
Here are some pictures that show how much white balance makes a difference in the quality of both filming and still images.
During the next session I also learned how to pan correctly around to different areas. If you pan to fast then from where you started to pan till where you stopped panning then everything in between will end up as a blur and also give someone a headache. Panning is to move around slowly and without shaking the camera.
 After lunch we quickly learned also how to film a good still image shot and also how to hold the boom in the right position to get a good sound and also to make sure it doesn't end up on the shot.
Next I went out filming with my group. We were supposed to film each other and say why we chose CRAM Media and also what we are looking to get out of CRAM. We decided to go to the car parks and take are first shot but because of the noise of the trucks coming in to the car park and decided to relocate. Instead we went next to the field and took a shot there.Then we went and took are second shot in between the big green box. That went by quickly and only took one retake.Then we went for are third and final shot which yours truly ...me had to take the stage.After a few retakes I finally got it right and then we started messing about a bit. I mostly managed the camera in the group and only didn't use it when I had to take my shot, but i think I worked pretty good on it. It was cool and funny to film and it was interesting. Probably I would want to goof of a bit less when I'm out filming so that I could work better.That's all we did for the first day and it was really good. :D
  I learned a lot of new things and hope to learn even more in the further weeks.